Tutorial Intro
Let's discover Reforge Launch in less than 5 minutes.
Getting setup with Reforge should take you 5 minutes, but only if we start right now ;)
Dashboard
After signing up, you'll see an onboarding dashboard. We've created your first workspace for you.
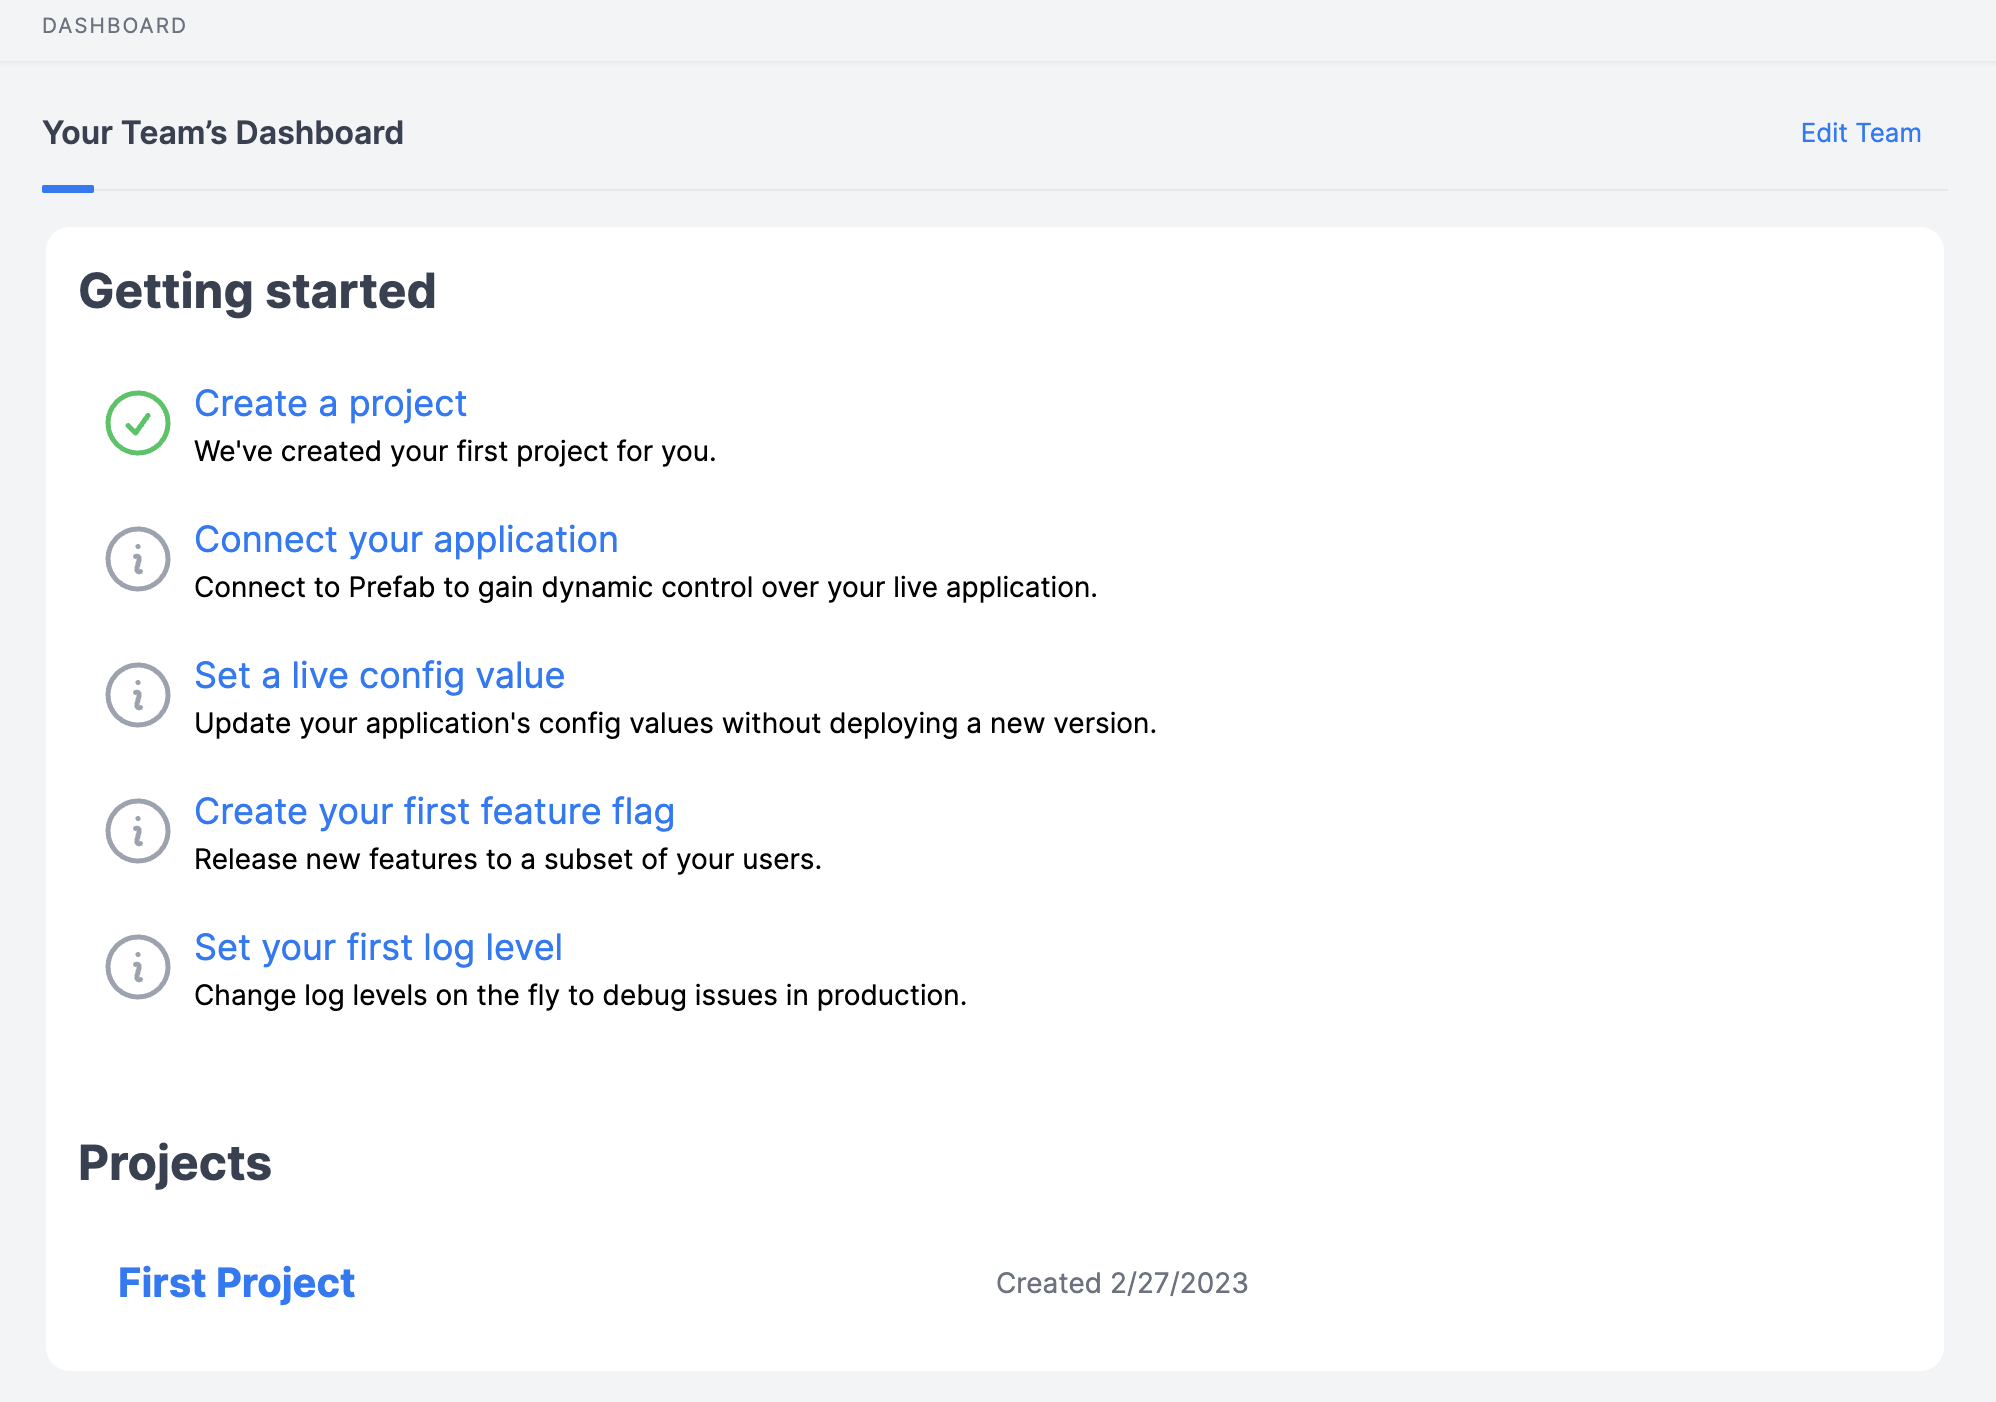
Most organizations will only want a single workspace.
Environments
Click on environments to view environments. We've added Development, Staging and Production for you.
API Keys
Our clients will need to connect to the Reforge APIs. To do that they'll need SDK Keys. Reforge has 2 different types of SDK Keys.
- Backend SDK keys are used for the server side SDKs. These keys will have access to all information for their respective environment.
- Frontend SDK keys are used in mobile applications or websites. These keys will allow the clients to evaluate feature flags for a single user, but will not expose the raw flag data. It will also not receive Configs, unless they are marked "send to front end".
Only use Frontend SDK Keys in code that gets shipped to end users.
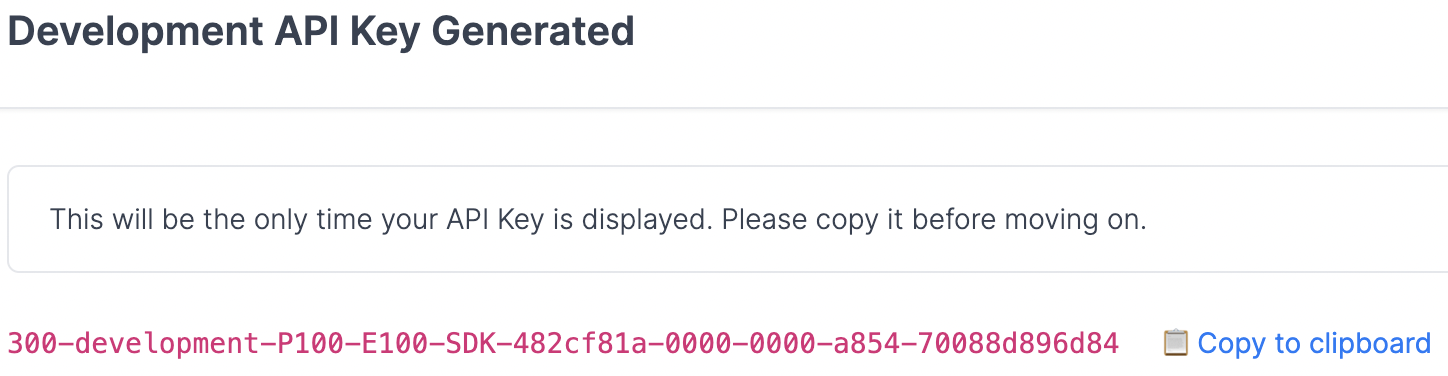
Let's create a Backend Key for now.

OK! We're all set, copy this SDK Key down we'll use it in the next step. We only show you the SDK key once and only store a secure hash on our end. Don't worry if you lose it, you can easily create as many as you like, which makes key rotation a snap.
Adding a Feature Flag
Now that we have an SDK key, we're ready to go. Select Flags from the navigation and then choose "Add Flag".
Let's name our flag features.example-flag and use the default type (bool).
Reforge suggests that you name things all in lowercase, with . as a logical separator and - between words.

Click Save and now we can take a look at our new feature flag. There are 4 elements to call your attention to.
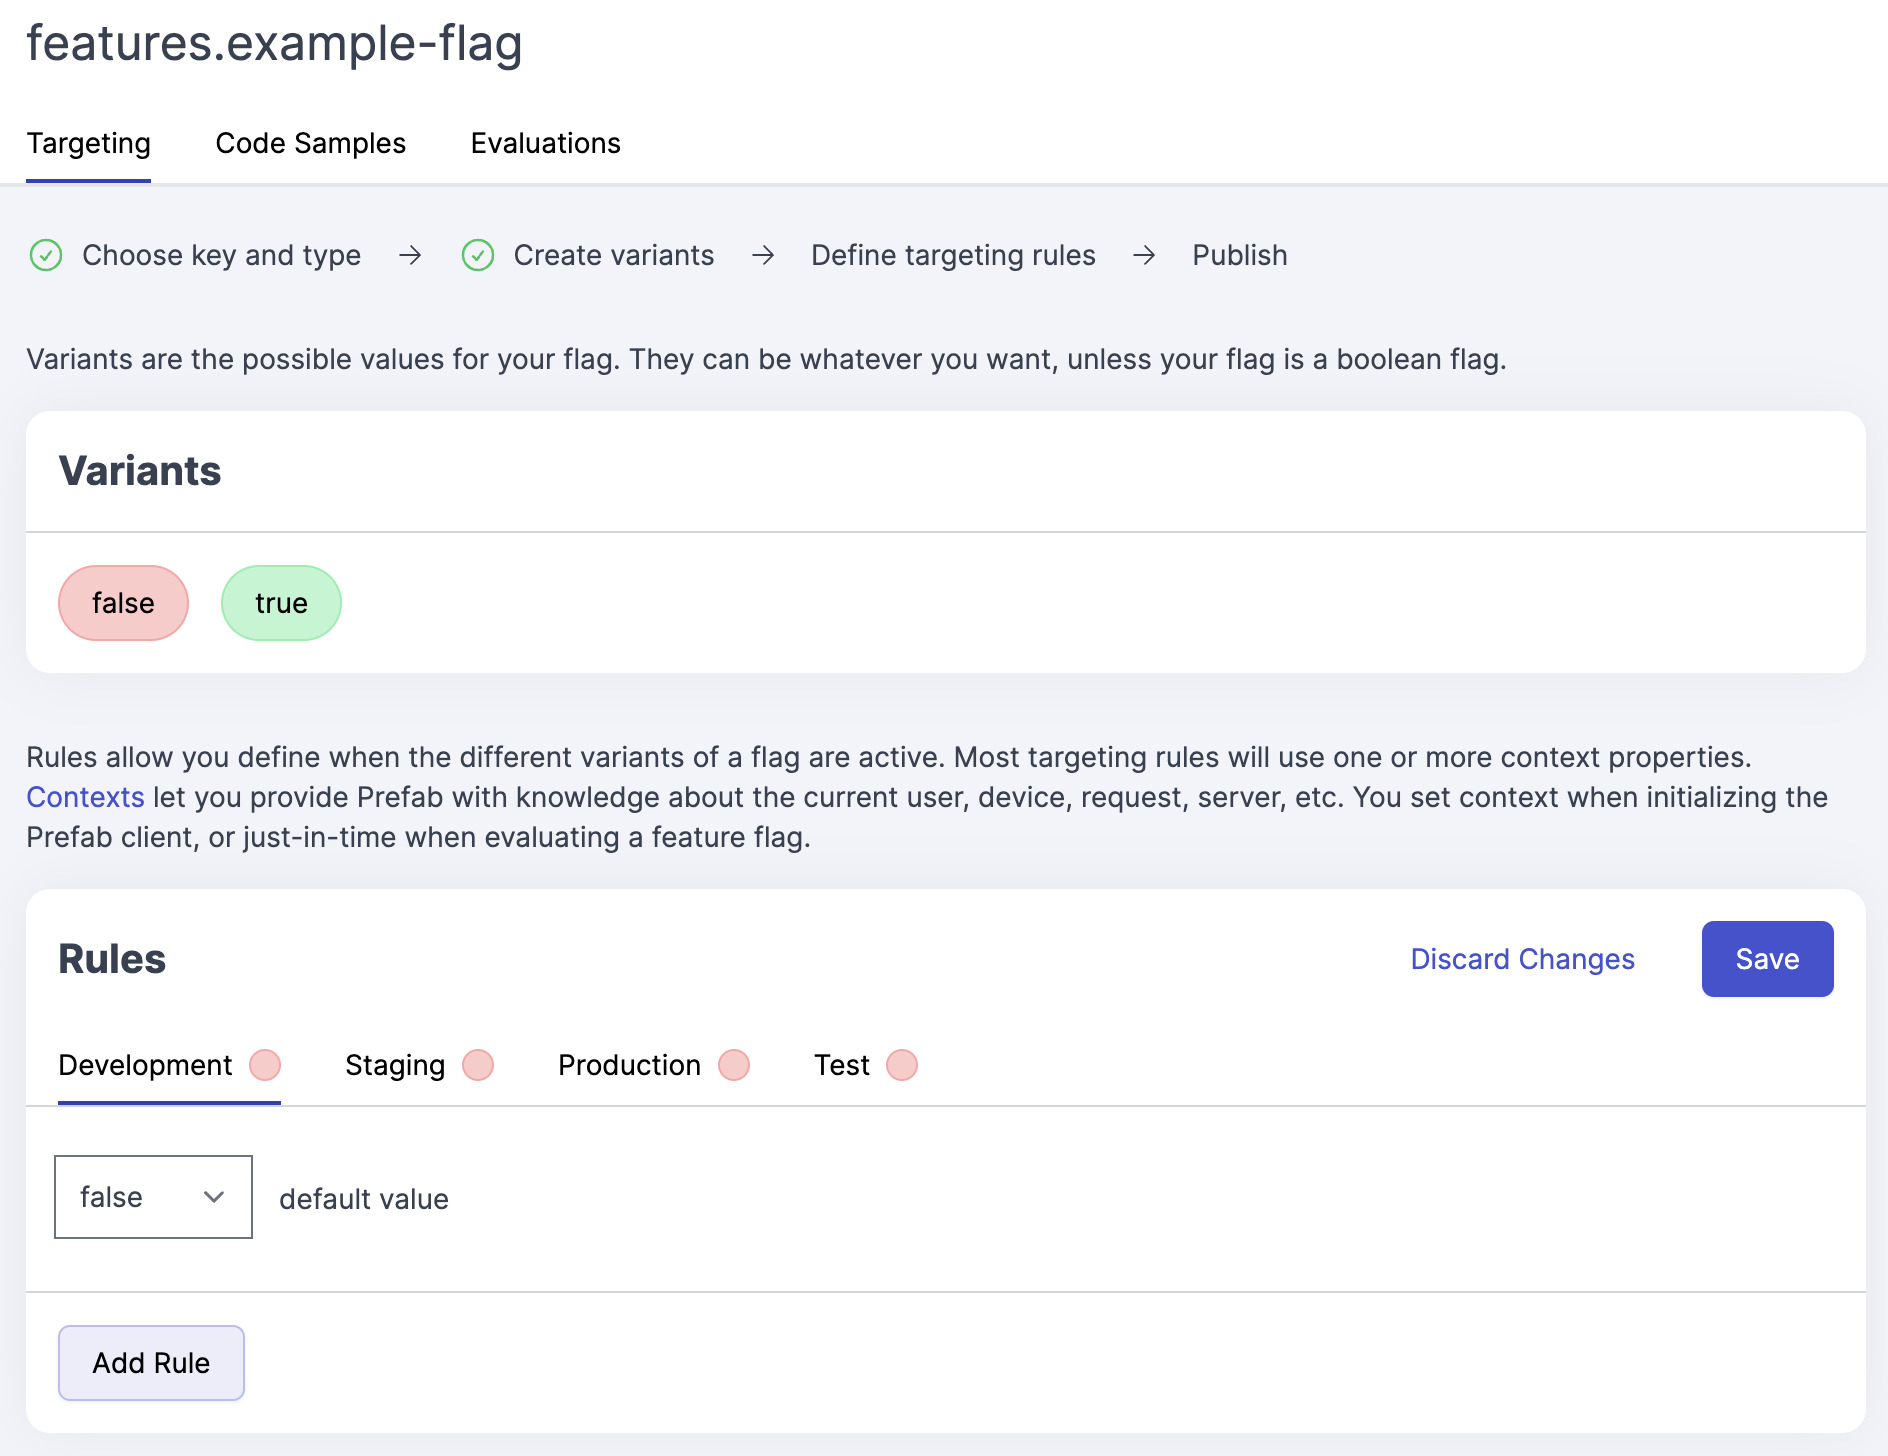
There are 5 areas to note:
- Variants The app has automatically created two boolean variants for us. Feature flags can return strings or numbers as well, but booleans are most common.
- Rules Each environment gets a tab for its own rules.
- Save Once we save the default value rule, we can publish our flag. Publishing makes the flag available to our clients.

- Code Samples snippets live here, making it easy to copy out the correct code into your application.
- Evaluations once we start running the client, we'll be able to see evaluation charts here.
Configuring our Feature Flag
Time for some fun. Let's set up a feature flag that will show us a bit of the power of Reforge Launch. For this example, let's say that we have a new thing we're ready to ship. We want to get ship to everyone in our Beta group. Additionally, since the beta group might not reflect our whole user base, so we also want to rollout to 5% of all traffic.
For the rollout, click the false dropdown and pick "Rollout". Now enter 95 as your percent for false and 5 for true.
Now click "Add Rule" to add our customer group rule. Select true then enter user.group for the when, is one of for the operator and beta for the values field.
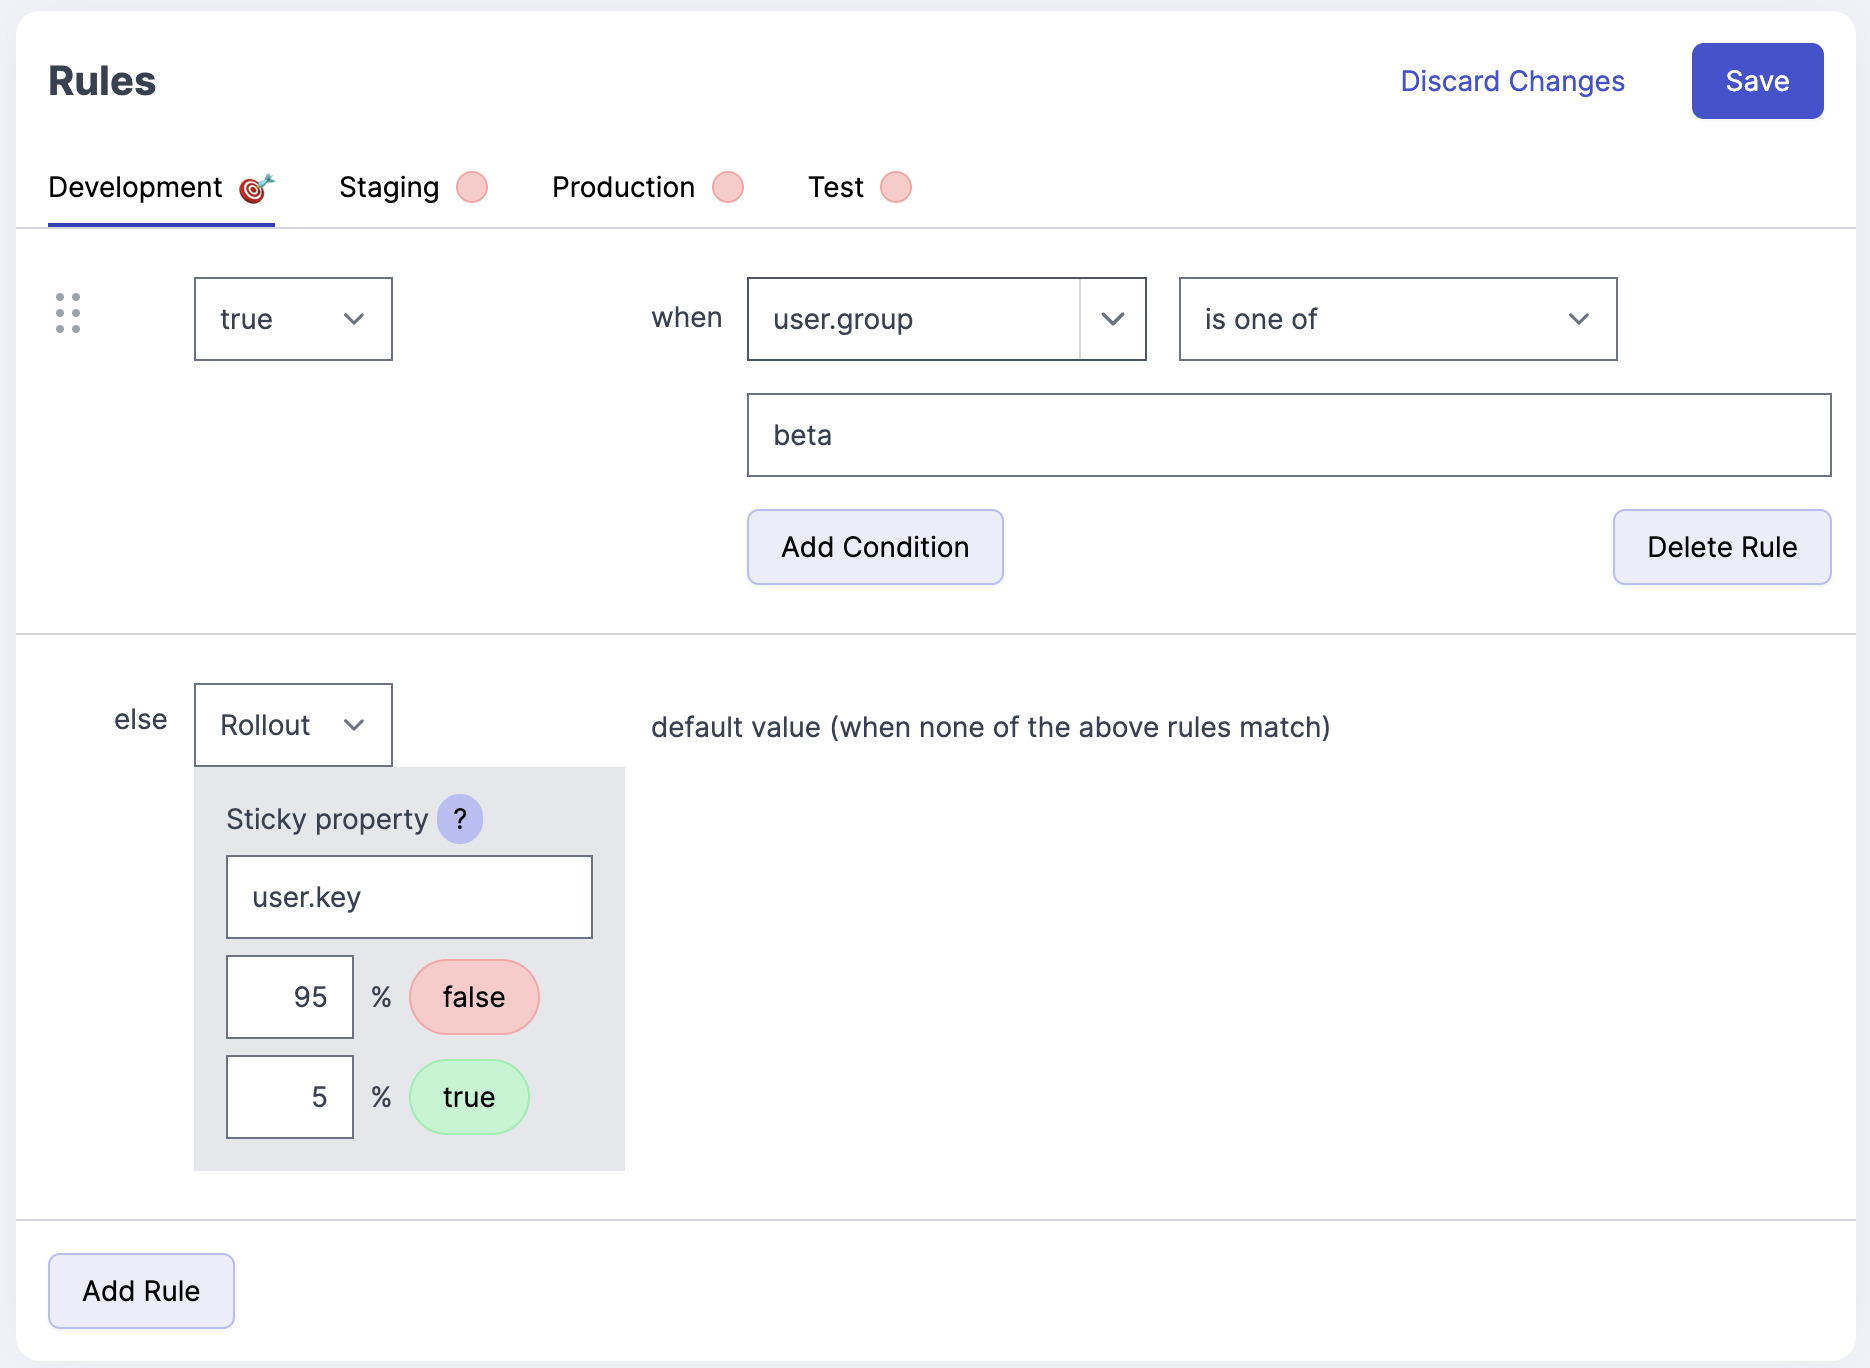
Save and publish.
The order of the rules matters. Rules are evaluated from top to bottom and the value of the first matching rule is used.
You can drag the rules to re-order them but the default rule sticks to the bottom.
Use in Code
To use the flag, all we need to do is initialize a client with the backend key we created and
- Ruby
- Java
- Node
- Python
Reforge.init(sdk_key: "<SDK-KEY>, or set ENV var REFORGE_BACKEND_SDK_KEY")
# Users in the beta group will always return true

context = { user: { key: rand(1000)}}
# 5% of other users will return true
puts Reforge.enabled?("features.example-flag", context)

# 100% of users in the beta group will return true
context[:user][:group] = "beta"
puts Reforge.enabled?("features.example-flag", context)
ReforgeClient client = new ReforgeClient(new ReforgeClient.Options()
  .setSdkKey("SDK-KEY, or set ENV var REFORGE_BACKEND_SDK_KEY"));
FeatureFlagClient featureFlagClient = client.featureFlagClient();

// true for 5 % of the users
featureFlagClient.featureIsOn(
      "features.example-flag",
      ReforgeContext.newBuilder("user")
        .put("key", Math.random())
        .build()
    )

// true because of the beta group rule
featureFlagClient.featureIsOn(
      "features.example-flag",
      ReforgeContext.newBuilder("user")
        .put("group", "beta")
        .build()
    )
import { Reforge } from "@reforge-com/node";

const reforge = new Reforge({
  sdkKey: "SDK-KEY",
});
await reforge.init();

// true for 5% of the users
const context = new Map([["user", new Map([["key", Math.random()]])]]);
reforge.isFeatureEnabled("features.example-flag", context, false);

// 100% of users in the beta group will return true
const context = new Map([
  [
    "user",
    new Map([
      ["key", Math.random()],
      ["group", "beta"],
    ]),
  ],
]);
reforge.isFeatureEnabled("features.example-flag", context, false);
reforge = Client(Options(sdk_key="SDK-KEY, or set ENV var REFORGE_BACKEND_SDK_KEY"))

context = { "user": { "key": random.randrange(1000)}}
# 5% of other users will return true
print(reforge.enabled('features.example-flag', context))

# 100% of users in the beta group will return true
context["user"]["group"] = "beta"
print(reforge.enabled('features.example-flag', context))
And that's it! A nice feature flag with a complex rule and a partial rollout in 5 minutes.
For this example, we used "Just in Time" context, passing the context block into the enabled? methods. In general, you'll set the context once at the beginning of the request and then use the enabled? method without the context block. Read more about context here.